DIY dorm decór
September 11, 2014
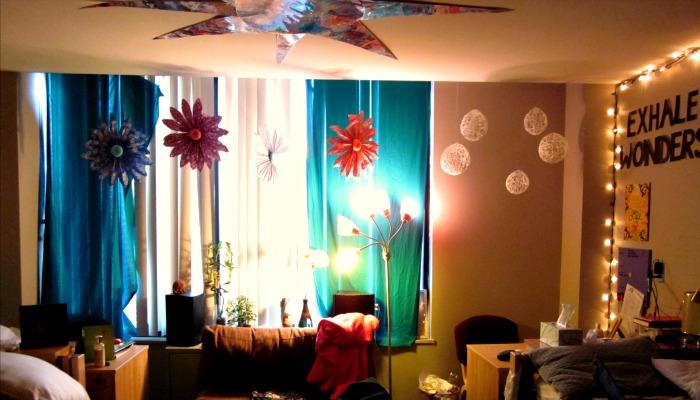
We’ve all been there: tight spaces, bland walls and blinds from the 70’s—dorm rooms aren’t exactly dream boudoirs.
UW-La Crosse freshman Amber Muetzel described her first impression of dorm life and said, “When I first moved in, I thought it was kind of small and dull, but once we got everything moved in and decorated, it came alive.”
So, there’s hope! With the right tools and a little inspiration, you can transform your dorm from chamber to chic with easy, do-it-yourself projects.
Getting the scoop on what’s trending on campus, Meutzel shared her own DIY dorm décor ideas.
“I put pictures on my desk and covered it with a sheet of glass to jazz up my desktop, along with glass jars for pens and pencils and some picture frames. My roommate brought a vase of flowers and we each have a cactus for a little greenery,” said Meutzel.
Mason jars in particular have become a popular trend for all sorts of DIY projects. From writing and makeup utensil holders to terrariums and flower vases, mason jars are perfect for the dorms. Add glitter, paint or lace to spice it up and coordinate with the rest of your room. “A little greenery” isn’t a bad idea as long as it is simple to care for. Living in a foreign bedroom, a small cactus or vase of flowers can be just the right touch to create a homey feeling.
Alex Miller, junior at UW-L and experienced dorm room occupant, said she has seen many of the same ideas, but also DIY canvases. These have become quite the fad as well, alongside mason jars, and can be purchased at almost any craft store. The best part? You don’t have to be an artist to create your own wall art. Simply covering the canvas with a coat of acrylic paint, letting it dry and inscribing your favorite quote is all it takes!
So, wall art and greenery are a great start, right? What about all those cords? And it still feels like a chamber because, let’s face it, the greatest source of light that is included in a dorm room comes from the window. The good news is there are simple DIY projects to resolve these issues too. To organize and hide your cords, place your power strip in a ribbon box (also found at fabric/craft stores). If you don’t want to spend money on one, a shoebox with six one and a half inch holes cut in its side works just the same. Finish it off by decorating and making the box pretty with scrapbook paper and ribbon.
Now, about that light—grab some extra LED lights from home and the possibilities are endless! Invest in some white ping-pong balls or small paper cups, create holes in each and stick on to each light. As another option, get your hands on some café lights and cut holes in medium-sized 3D cardboard letters to make “UW-L” or your initials. Poke the lights through to make the perfect room décor. Voila!